At this point I felt like things were moving relatively quickly. Little did I know at the time, I would be mostly sanding for the next year. As I write this today, I have flipped over the hull and am working on the inside. Finally a change of scenery! The next few post are going to walk through the steps between laminating the hull and flipping it over.
I think its important to mention (if I haven’t already), I don’t spend an obsessive amount of time on the build. If I had to guess I’d say about 10 hours a week might be fair estimate and at least a couple of those hours each week are spent staring at the skiff trying come up with a solution to something.
So without further ado… What do you do with a freshly basalt laminated upside-down skiff?
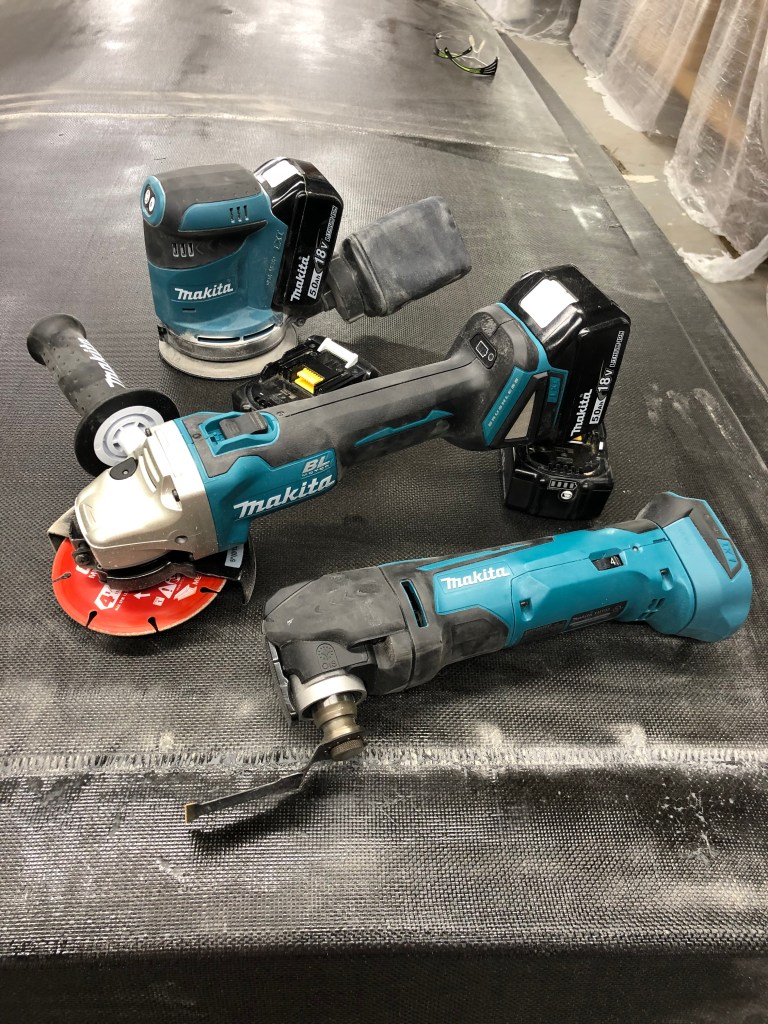
Fist I cut off the access material around the sheer flange.
Cutting off the extra basalt was done by this trio of good fellows.
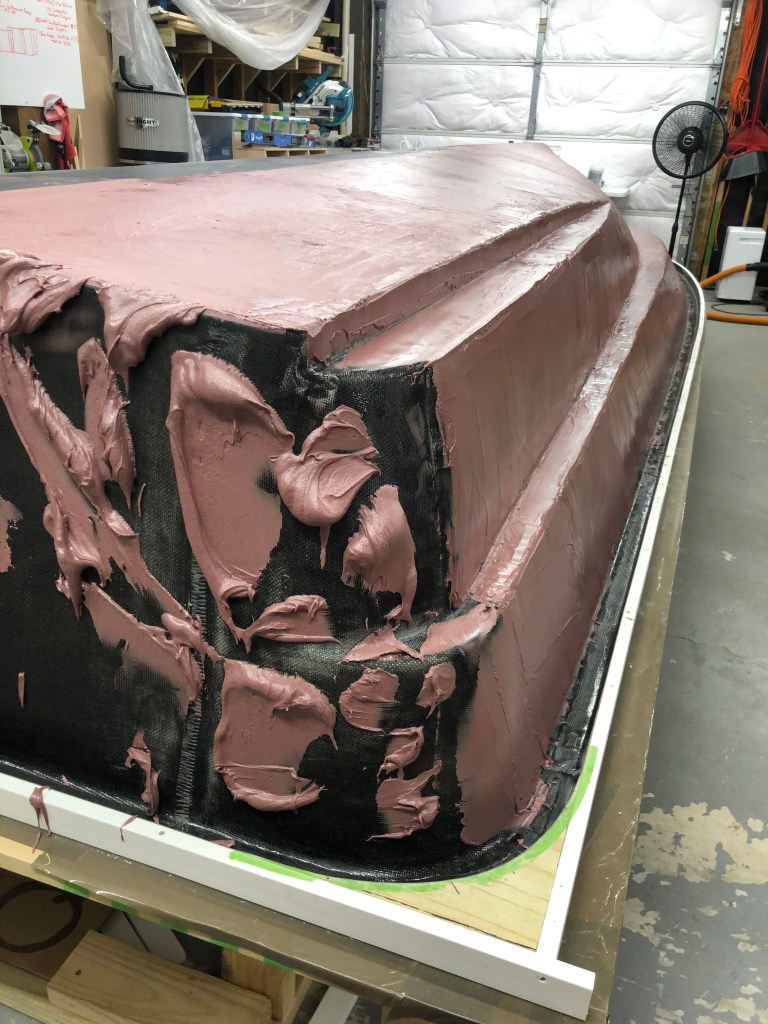
Next was giving the hull a a light sanding. This is to give the fairing compound something to stick to as well as find the inevitable bubbles where the epoxy did not get fully saturated or the basalt pulled away from the core and created a void. Bubble show themselves much easier once the surface has been sanded. There were a couple of areas that had bubbles and the causes were the same. Corners were too tight and basalt slowly pulled away as it cured.
What comes next is optional depending on how well you did the laminating. Time to clean out and patch the bubbles.
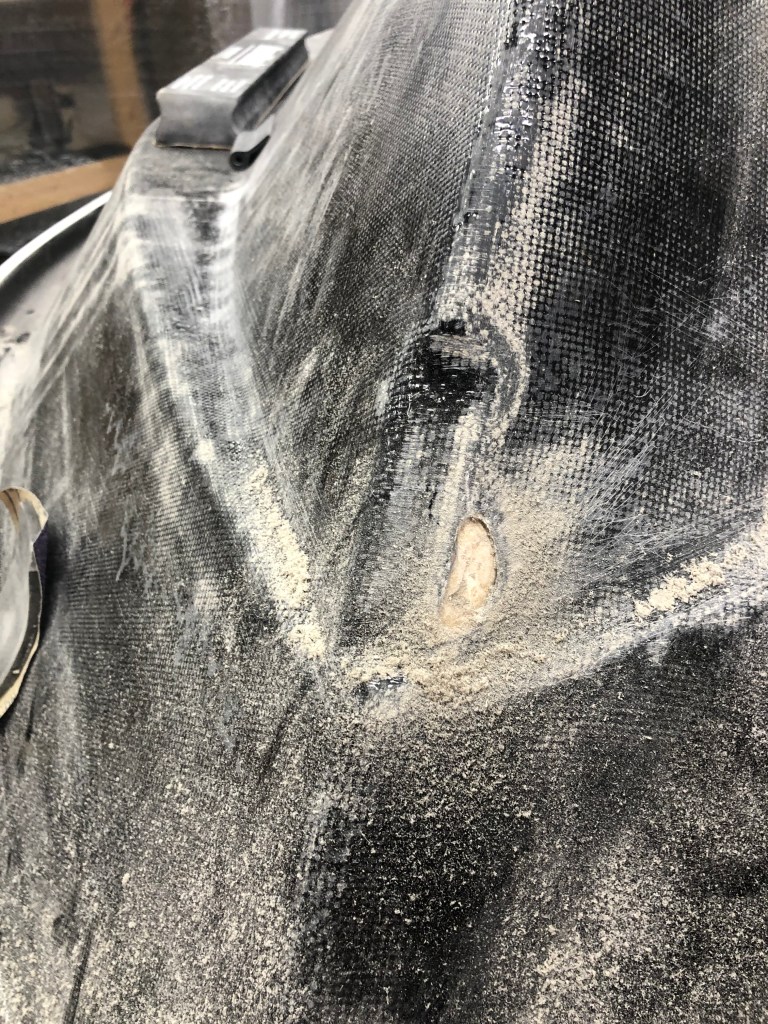
Here are a few spots where the material pulled off the skiff on the edges. It was pretty easy to find them when sanding, the spots that have voids beneath them sand very easy and give away when you put pressure on them. Here is a all the way through bubble right next to the bow eye location. Not a great spot! No fear though, it gets a quality patch job. This was a long one that ran down the lower chine. I’m sure we were focused on the bottom near the sheer flange and pulled the basalt tight and forgot to check the area pictured above. Here are the finished repairs. In order to keep the same thickness, I cut three pieces of basalt each a different size, and epoxied them over the cleaned up holes. It’s important to get all the air pocket out (even if that takes you back to the core) and all the debris gone before making the repair.
The patches in the pictures above lack glossiness because I put PeelPly over the wetted out basalt. It helps hold it down on the tight corners. PeelPly is a nylon fabric that keeps almost works as a tape as well as keep the curing from producing amine blush. Good stuff and easy to use.
There were a few other minor voids that I didn’t share with pictures but I followed the same process to identify and repair those.
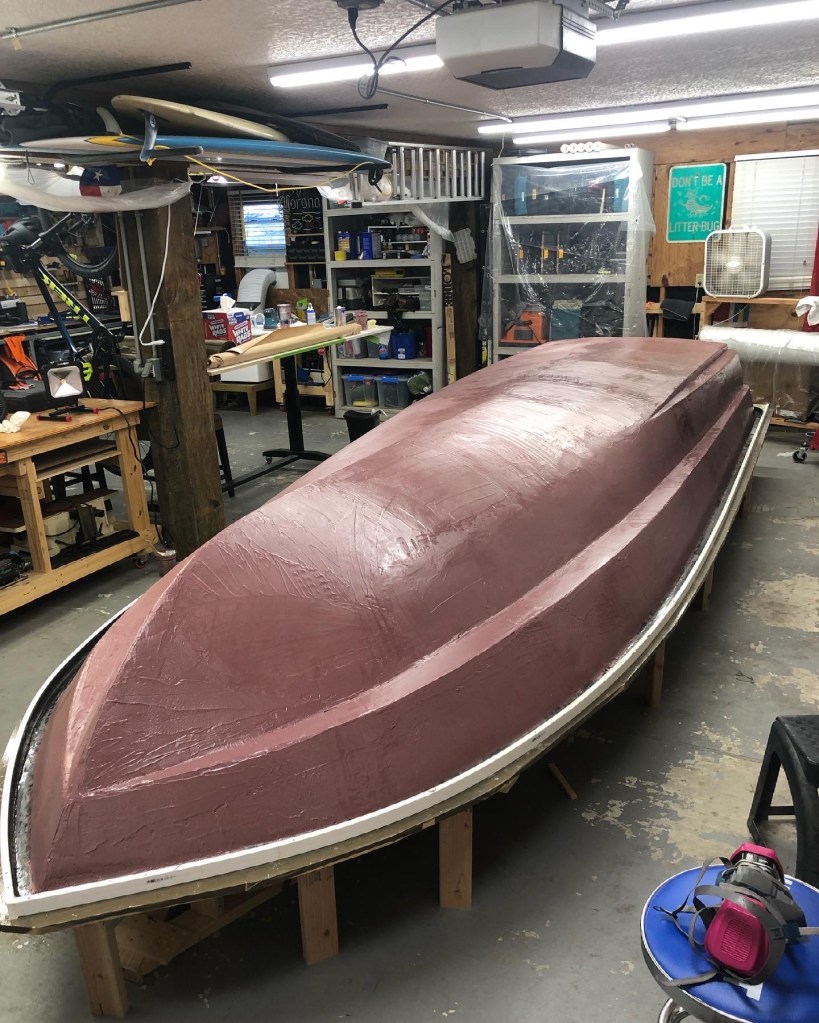
Step four is to frost the cake! The hull is not smooth right now. There are the overlaps in the basalt and imperfections in the foam and form shape that have made their way through. If you were to paint the skiff right now, it would look really bad. So in order to make it smooth to the eye and cut through the water with minimal drag, it needs to be faired smooth.
The process of fairing is simple in explanation, however it’s quite time consuming in execution.
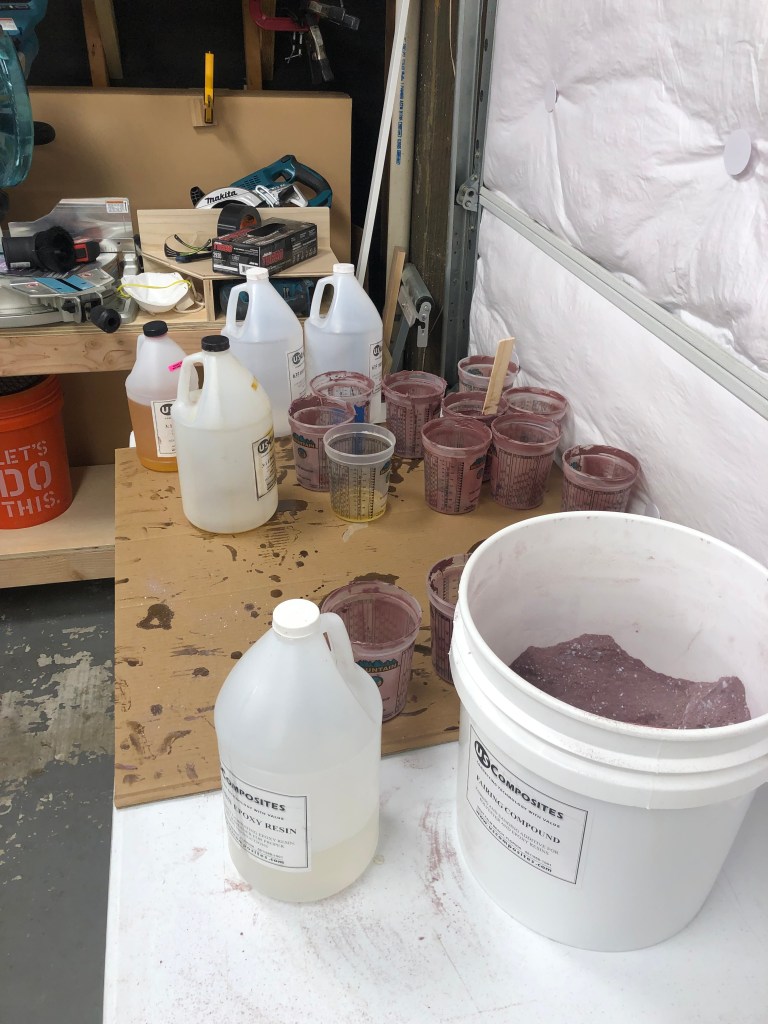
Fairing starts with coving the hull in a sandable yet durable compound. It sounds a bit paradoxical to be easy to sand and durable but this is where you get your variety on material that can be used as the faring compound. With all the oyster rash that’s inevitable for someone on the Texas Gulf Coat, I wanted to go with something more durable than just glass bubbles and epoxy so I opted to use a product called the SM Fairing Compound by US Composites. SM fair has some additives that give it some additional strength as well as a reddish pigment that I think makes it easier to see the undulations and imperfections. It is a pain in the butt to sand though and I hope that all the extra sanding will prove worth it in the end.
The process for making faring compound is pretty straightforward. First: mix up epoxy resin and hardener like you would before you pour in on fiberglass. Second: add in the fairing compound incrementally by mixing up and adding more until it gets to have a creamy peanut butter texture. I used lots of mixing cups during this process because I didn’t want to get hardened pieces mixed in with the creamy and leave marks when spreading it out. Getting it smooth and uniform takes some finesse, the better you can get it, the more work it will save yourself when the sanding starts. It helps to get the the fairing compound out of the mixing cup as soon as possible because it cures faster when its packed on top of itself. So I just throw a bunch on the skiff and then spread it out from there.
This stuff gets hard pretty quick so it’s important to keep moving quickly.
Boom, the easy part of this phase is complete. I use the word “easy” in relation of what is to come next. Time to sand!
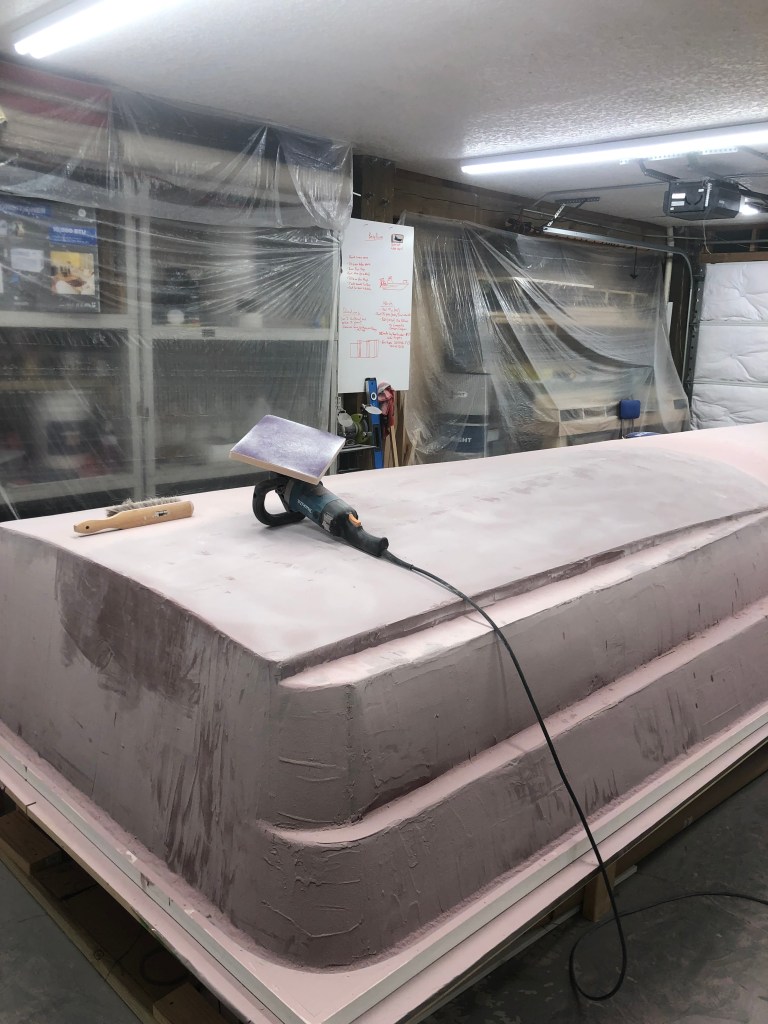
I think I severely underestimated the amount of time and energy it would take to sand this skiff down to a smooth shape. It might look fairly close in the picture above, but there is so much that can only be seen with eye and touch. Plus there is adding and shaping edges, chines lips, strakes, and just a whole bunch of general filling and fairing.
I may have over done the fairing somewhat, but in my head I was thinking that didn’t want any imperfections that would affect the performance. I believe that every little flaw adds up and creates additional drag or other unwanted effects. Plus, if your going to do something, do it right!
So here are the highlights of the process I went though to get the skiff as fair as I could possible get it.
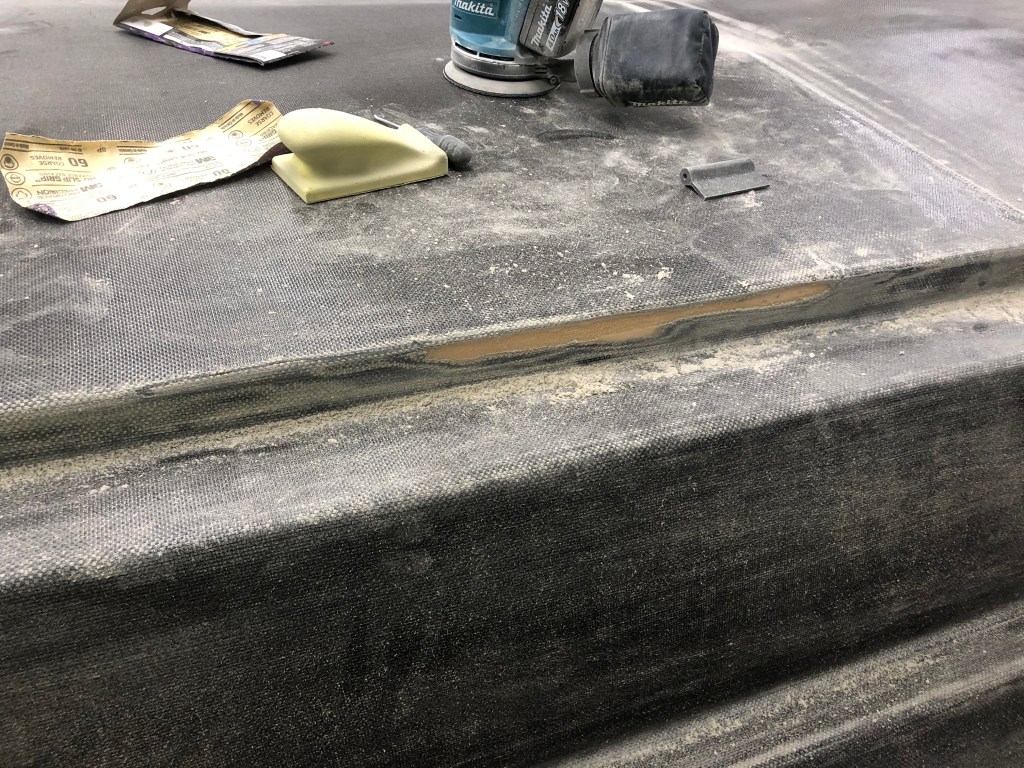
I’m a big proponent of sanding by hand for the most part because my experience is too much power/speed, can end up leading to some mistakes really quick. However, For the running pad and some of the more flat areas, This tool was really handy. I took a buffing sander and attached a piece of foam board the same size as a full sheet of sanding paper. I then use Gorilla Glue spray to stick the sandpaper to the buffer. This give you a really large flat sander that is really efficient on areas like the running pad. When you get your tool put together, it’s just a matter of putting it to work. Measuring devices are your friend for this stage. Important to use a long level (96″) to get the running pad and chines flat. Don’t forget the PPE! A respirator is critical because most sanding kicks up a lot of dust. It might feel like you get get away with it once or twice but if when you add up all the time spent sanding, there is no way I’d want all that in my lungs.
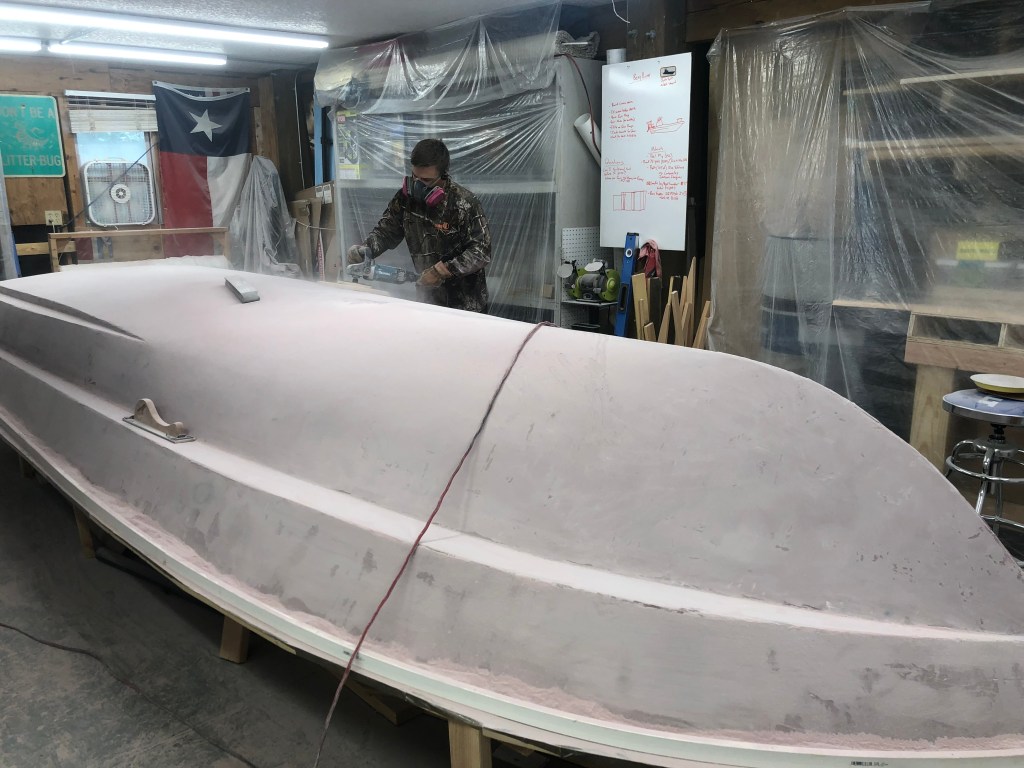
You can see in the picture that I have multiple long sanding boards. Most times it just feels more controlled to do by hand. In some areas I sanded down to these little voids. I’m guessing this is because I had too much air in the mixture. Likely I had too much fairing compound and and not enough epoxy. I ended up sanding this down and then filling it with more (better proportioned fairing compound/epoxy)Another super handy tool is the file sander. This one is pneumatic and required that I upgrade my air compressor in order to be able to continuously operate it. After I knocked down the easy to find high spots, Then it was time to deal with the low spots. To do this, I mixed up some more fairing compound and pulled a straight edge over it to try and blend it in. You can see in the picture all the fresh areas from filling the low spots. This process gets repeated a bunch. I don’t know how many times I did this because I lost track.
From here it’s a bunch of sanding, checking, sanding, checking, filling, sanding checking and repeat. If you think it sounds boring then you’re spot on. I found this a good time to listen to multiple audio books, I even managed to listen to the entire bible during this period!
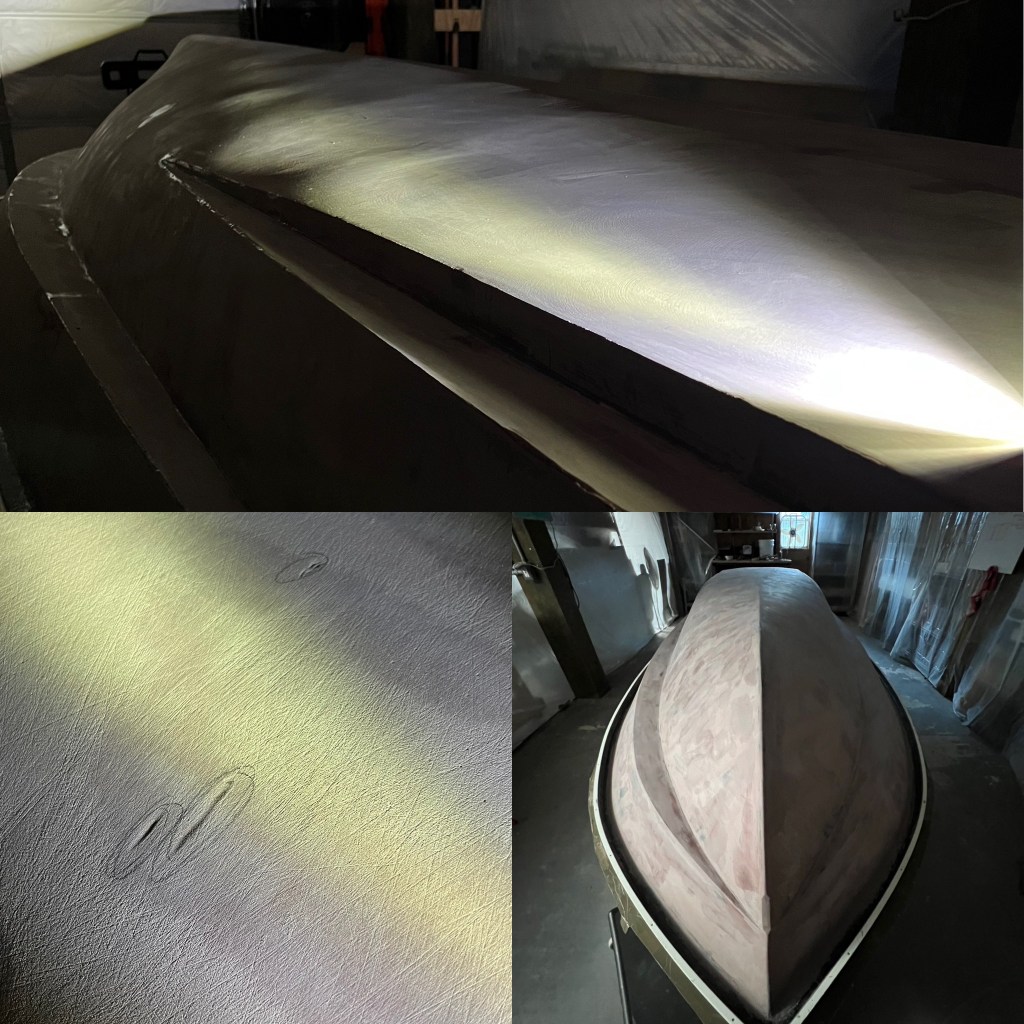
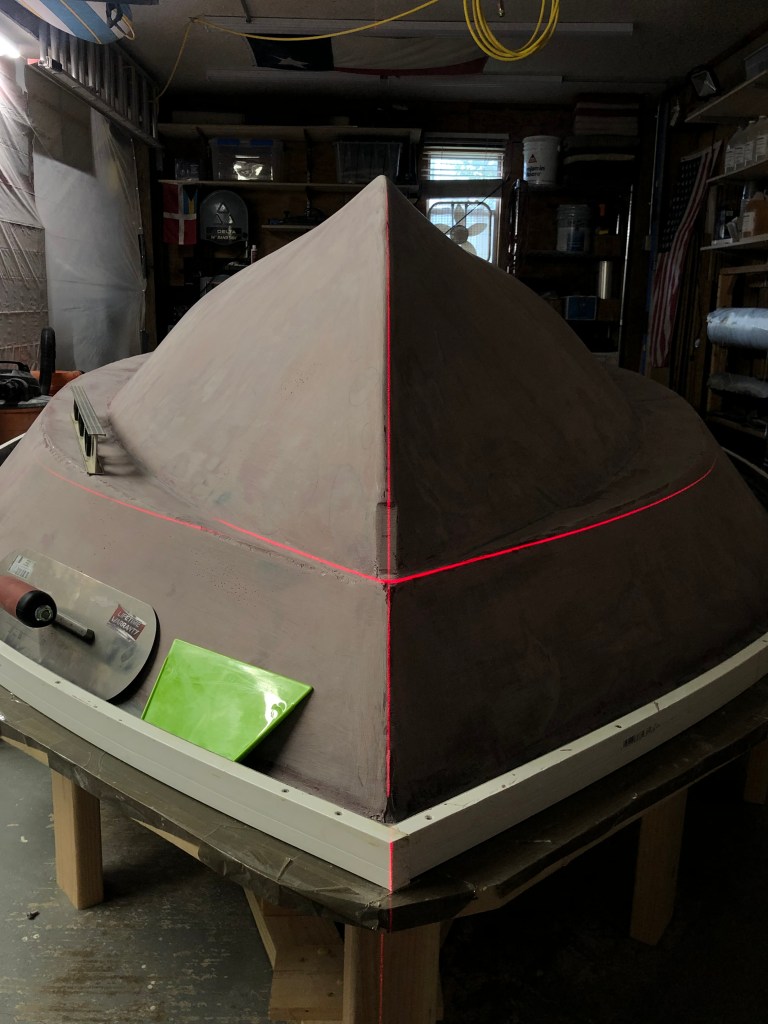
Using a light at different angles can reveal many imperfections (big and small). In the top picture, you can see a bunch of waves that needed knocking down on the bottom of the hull. Bottom left picture shows some little areas that need filled. It’s amazing how much better you see these things when you are looking for shadows. I ran around with a flashlight many times hitting the hull at different angles and circling things that needed fixing.Once the hull is fairly close to being fair, I began to shift my attention to other areas. Pictured above you can see when I put the laser on the bow, it revealed that I had some correcting to do. As pictured, the left chine is lower than the right. To fix this is had to add fairing compound and blend it in. As for the bow eye location, I spent a lot of time getting that to be even. Like many areas, you have to add some material, sand it away and repeat multiple times. The laser is a critical tool. I wish I bought a green one though because they are brighter. The 8 foot level is another must have tool. At this stage I used it mostly for looking for low points or hight points where something should be flat. In the bottom left picture, I calculated the latitudinal angle to be about 3.5 degrees for the rear section based on the drawing. Which makes since because its angled back to the water to keep it from spraying up and getting the passages wet.
This is basically the process that kept me busy for about 6 months or so. Granted I was only working on it casually with only a few all day grinders here and there.
This post is getting pretty long so I think I will call it here and get to work catching up on the next post where I will go into detail on some of the tricky areas in the phase that require a bit more finesse.