For this post, the topic is Primer. Awlgrip’s High Build Primer to be more specific.
In the last post, I talked about getting the hull to shape, and at the end of that post I mentioned prepping for paint by filling in all the little imperfections. Well, you can only do so much with fairing compounds, so I was thankful when I discovered High Build Primer. High build primer goes on as the first coat of paint, it’s purpose being to fill the zillion little flaws in the surface that you can’t see. It’s pretty soft stuff and sands like butter, which is good because most of it is going to come off later on.
While this primer is great to work with, the manufacturer does specify it is to be sprayed only and not rolled. Well, until this point I had never sprayed anything before so I guess if I was going to have to learn, it’s a good thing to learn on something that will get sanded off regardless of how well, or poorly, I spray it on.
Before I could spray anything though, the shop would require a couple of upgrades.


The system has been a great add and the dryer has worked well. Here is the link to the dryer if interested. 3 Stage Heavy Duty Dryer Also you will notice on the next picture, that I added another water separator right before the gun. I don’t remember ever finding any moisture in there, so another kudos to the effectiveness of the dryer.

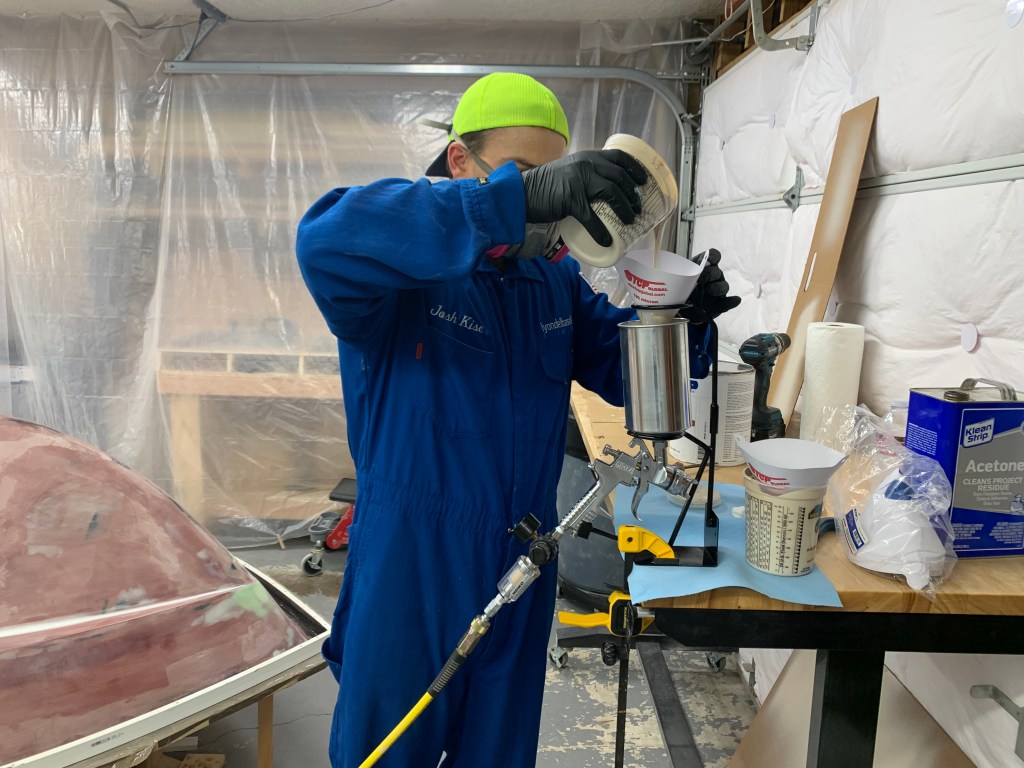
The paint is a two part system, mix by volume one part Base with one part Converter and desired percentage of reducer to a smooth mixture. Then the paint has to sit at least 15 minutes for what’s known as an induction period before using. While the two parts are getting to know each other, this is a great time to give the surface to be painted, one more good wipe down with your cleaning solution and tack cloth. Make sure whatever you use to wipe it down has fully flashed off before beginning to paint. After the induction period is up, I gave it another mix and poured it through a fine paint strainer directly into my paint gun.
Awlgrip recommends a gun pressure around 30-35 PSI and to use a 1.6-2.0mm nozzle. I opted for a 1.8mm because I don’t know what I’m doing and figured landing in the middle was the safest bet. The 1.8mm nozzle ended up working just fine.
It’s important before you begin painting you check the pressure at the gun and get your gun dialed in on some cardboard. I watched about a dozen videos on YouTube about how to paint before I got started and there are some really good videos out there. I think the automotive painters have the most videos and it’s the same process.


Around this stage there appears to be a fork in the road for some builders. Some elect to stay the course and get all the way to final paint before flipping the hull over to work on the inside.
I had been told when you pop it out of the mold that it was going to be very flimsy and not at all structurally sound. That being said, I didn’t want to take any chances at cracking the hull and messing up any additional work, so I thought it best to give the skiff some strength before putting the finish paint on it. Plus, I had looked at it upside down for well over a year and I was eager to get started on a new frontier.
Building this has been one of the most challenging projects that I’ve ever attempted but every problem solved and every milestone achieved has been so gratifying!
“If your dreams ain’t bigger than you, there’s a problem with your dream.”
Deion “PRIME TIME” Sanders
Being that I like to leave a quote at the end of each post, I was obligated to use a Deion Sanders quote at some point. His nickname is Prime Time (name of post) and his last name is sanders…
